Show image on text hover in Cargo 3

In this blog, we will learn how to show images on text hover in Cargo 3. We are going to create this using HTML and CSS.
Show image on text hover in Cargo 3
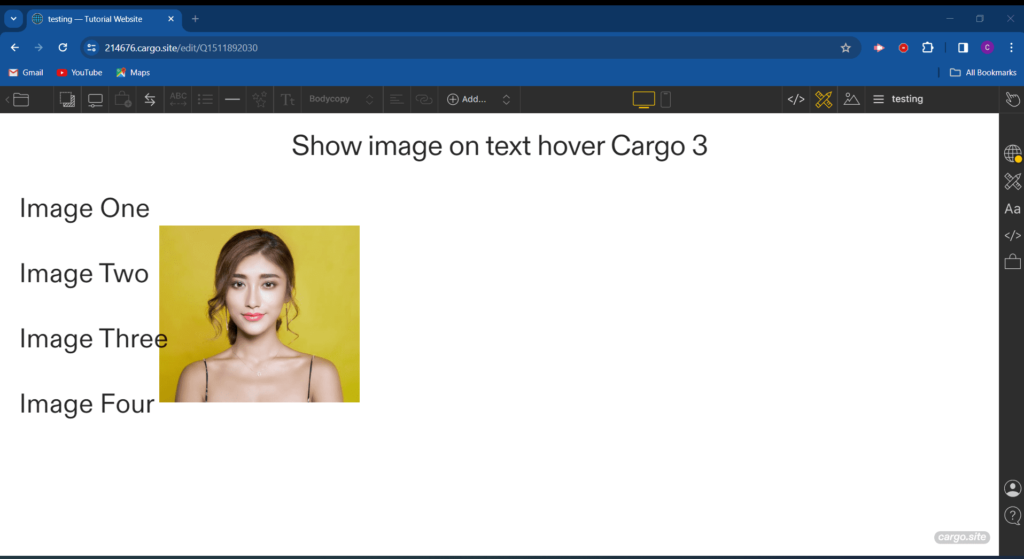
Add HTML in Cargo 3 Editor
- Upload Your Images: First, go to your Cargo 3 Editor and upload the images you want to use.
- Add Text and Images: Write the text you want to display alongside each image. Then, drag each image from the uploaded images section into the editor, placing them where you want them to appear next to the text.
- Switch to Code View: At the top of the page, you’ll find an option labeled “Code”. Click on it to switch to the Code view. This will let you see and edit the HTML code directly.
- Wrap Text and Images: Now, you need to wrap both the text and the image inside a
<div>element that has the class “imageBox”. This<div>acts like a container that holds both the text and the image together. - Add the Image Code: After the text for each image, you’ll see a code snippet that starts with
<media-item class="zoomable imageHide" hash="...">. This code represents the image in Cargo. Make sure it’s placed exactly where you want the image to appear in relation to the text.
<div class="imageBox">
Image One <media-item class="zoomable imageHide" hash="H1597649767892499693895439060607"></media-item>
</div>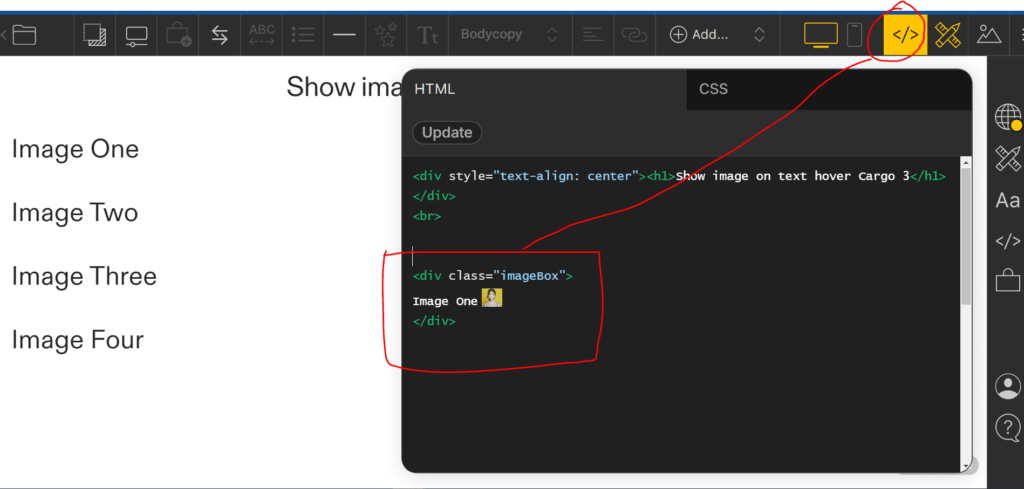
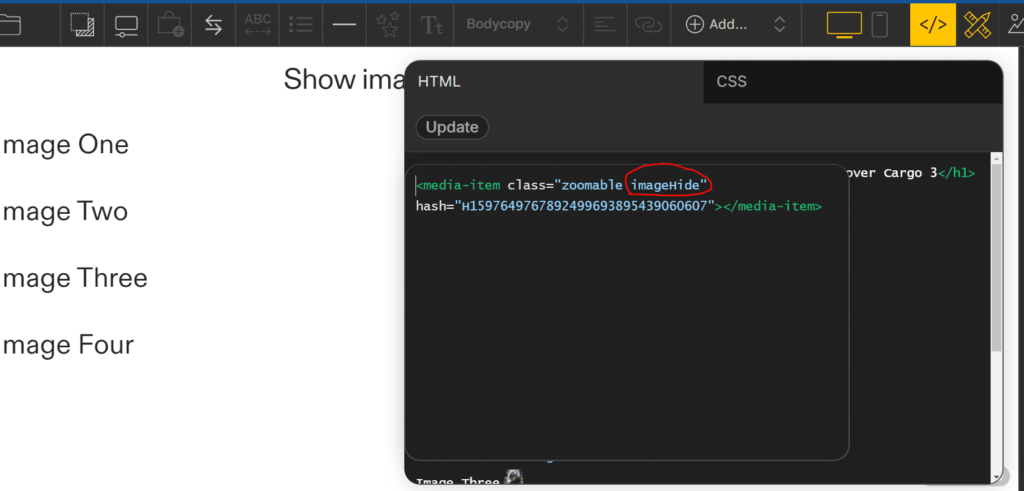
Add Class to the images
- Select the Image: In the Code view section, find the image you want to add the class to. Click on it.
- Open the Popup: After clicking on the image, a popup window will appear with the image’s code. This popup lets you edit the image’s properties.
- Add the Class: Inside the popup window, look for the place where you can add attributes to the image’s code. You need to add the class “imageHide” to the image. This tells the browser to initially hide the image.
- Save and Close: Once you’ve added the class, save your changes and close the popup window.
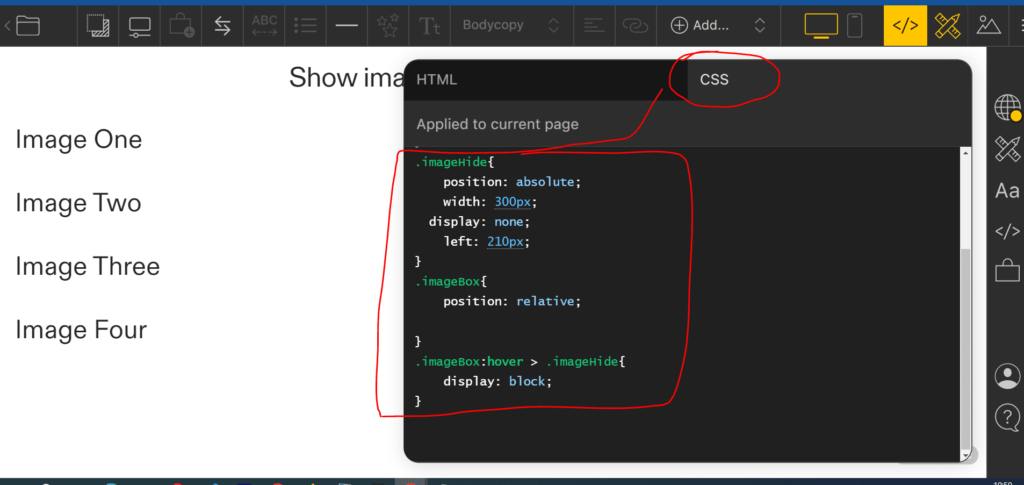
Add CSS in the Code view
Now go to the CSS editor and add the following code mentioned below.
Code Explanation –
- Positioning the Images: We’re telling the computer where to put the images. They’ll be placed inside boxes called “imageBox”. The
position: absolute;part is like giving each image its own space andleft: 210px;saying how far from the left side of the box each image should start. - Hiding the Images: We’re starting with the images hidden.
display: none;makes them invisible at first. - Making the Boxes: We’re also setting up the boxes (
imageBox) to hold the images. Theposition: relative;part helps keep things organized. - Showing the Images on Hover: When you move your mouse over a box (
imageBox), we want the hidden image inside that box to show up. So,:hoveris like saying “When someone’s mouse is on this box,” anddisplay: block;makes the hidden image appear.
.imageHide{
	position: absolute;
    width: 300px;
  display: none;
    left: 210px;
}
.imageBox{
	position: relative;

}
.imageBox:hover > .imageHide{
	display: block;
}
Congratulations we have successfully added the show image on text hover in Cargo 3.
I hope you have found this blog helpful. Thanks for reading🚀
If you have any questions or need help with your Cargo Site, feel free to ask in the discussion forum.
