Change custom cursor image in Cargo Site

As a Cargo Collective user, you may want to customize your website’s cursor icon to give it a more personalized touch. The cursor icon, also known as the mouse pointer or mouse cursor, is the small arrow or hand that appears on the screen when you move your mouse. In this blog, we will explore how to change custom cursor image in Cargo 3 as well as in Cargo 2.
So let’s get started🚀
Change custom cursor image in Cargo 3
Follow the step below to change the custom cursor icon image in Cargo 3.
STEP 1: Upload the cursor image in Cargo 3
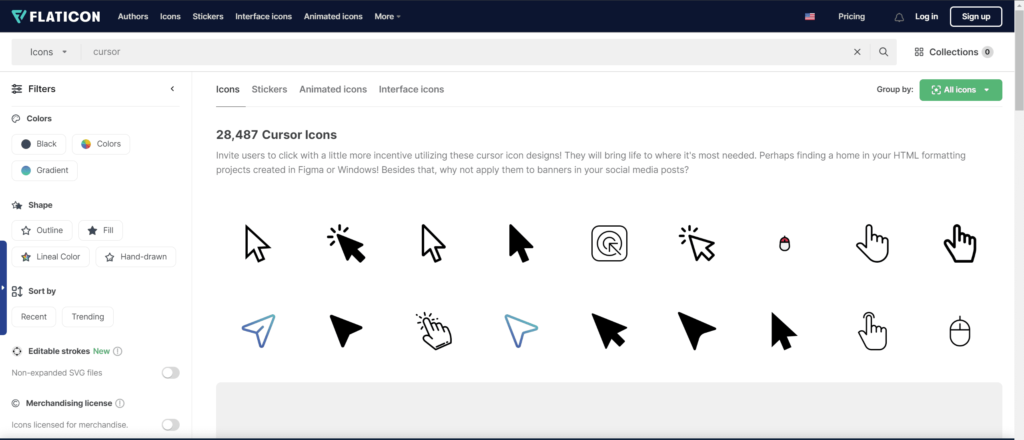
To get some cool cursor images, visit websites like Flaticon or Icon8. Download the cursor images of your choice.
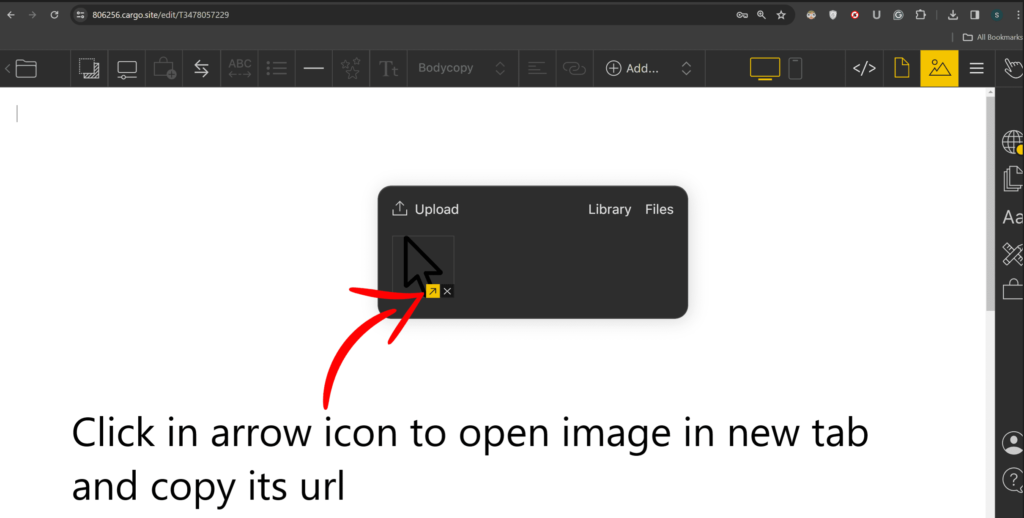
Next, open your Cargo 3 editor and upload the cursor image. Hover over the image thumbnail and click on the small arrow icon. This will open the image in a new tab. Copy the URL of the cursor image.
STEP 2: Add CSS to use a custom cursor in Cargo 3
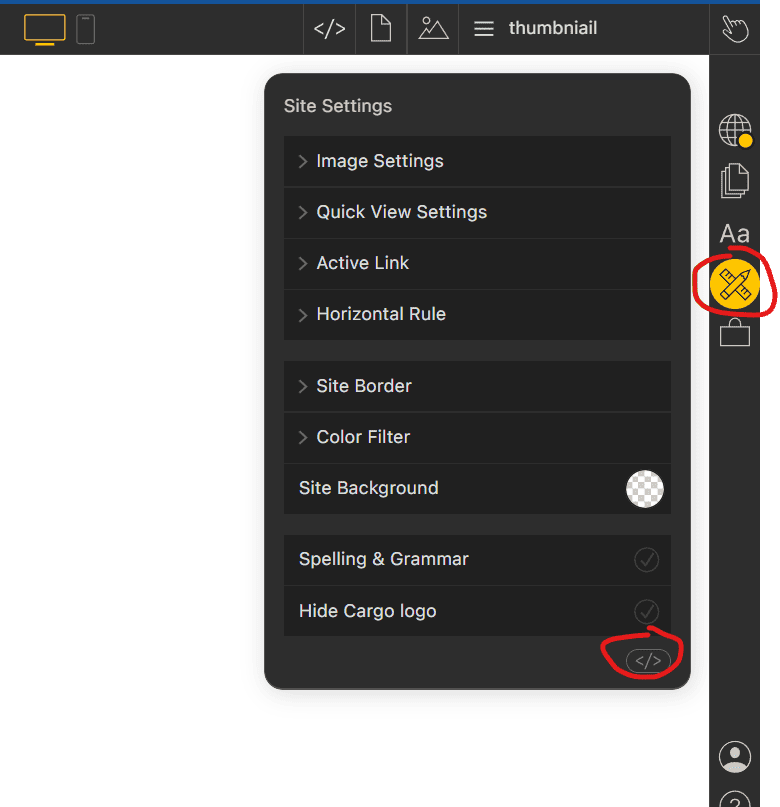
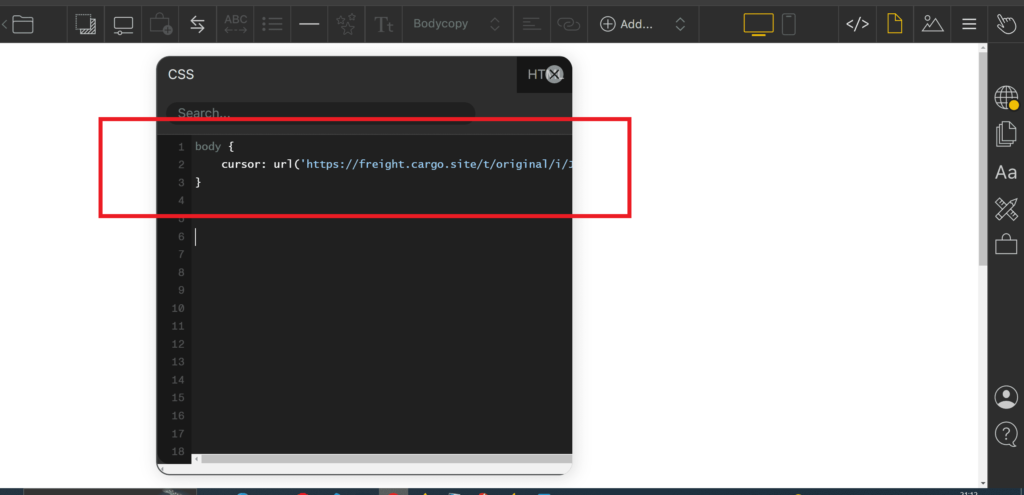
Click on the ruler icon located in the right sidebar of your Cargo 3 editor. Then, click on the code icon to open the global code editor. Add the following code to implement the custom cursor:
body {
    cursor: url('your-cursor-icon-url'), auto;
}
Replace 'your-cursor-icon-url' with the URL you copied earlier for the new cursor image. This code targets the body element and sets the cursor property to use the custom cursor image.
If you want the cursor to change only when hovering over an element linked to a particular page or anchor, target the <a> tag and add the :hover pseudo-element. Then, assign the cursor URL.
For example:
a:hover {
    cursor: url('URL_of_the_new_cursor_image'), auto;
}
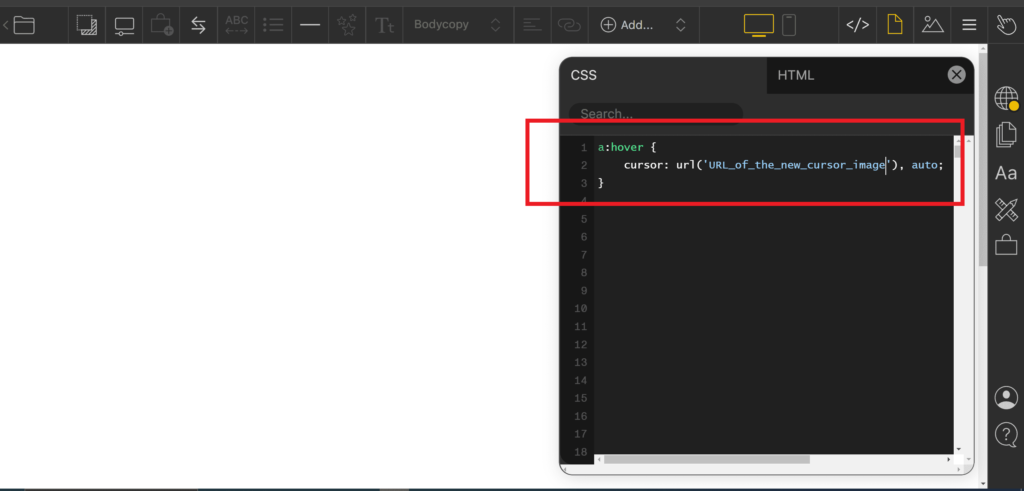
So we have successfully added the custom cursor image for Cargo 3.
Change custom cursor image in Cargo 2
Follow the step below to change the custom cursor icon image in Cargo 2.
STEP 1: Upload the cursor image in Cargo 2
Choose a cursor icon from sources like Icon8, Flaticon, or create your own using software like Adobe Photoshop or Illustrator.
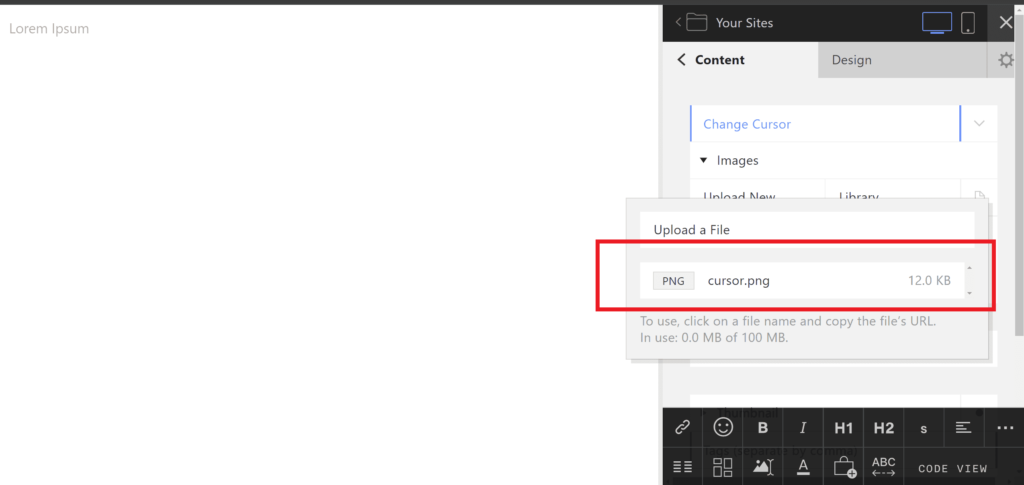
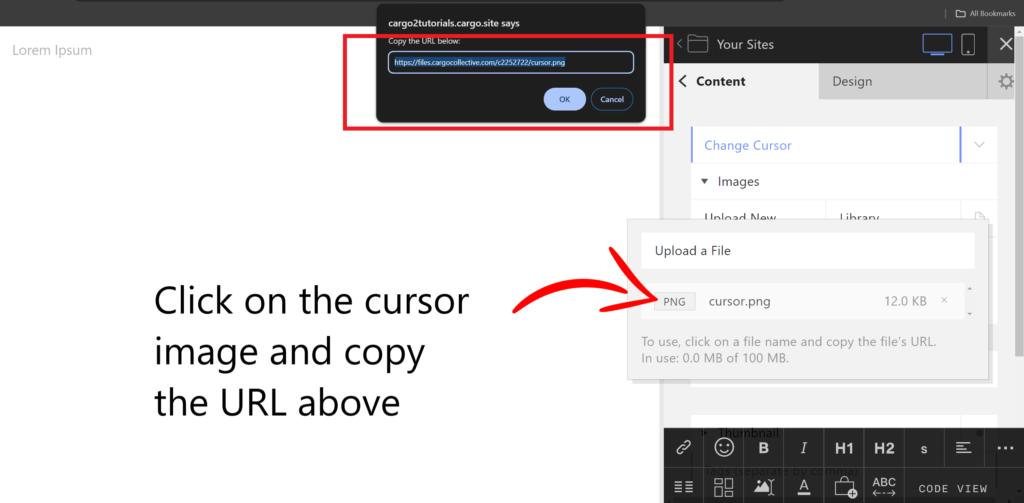
Upload the cursor icon to your website by logging in to your Cargo 2. Navigate to the desired page and upload the cursor image. Click on the uploaded file to obtain the image link.
STEP 2: Copy the cursor URL
After uploading the image, click on the image itself. This action will open a pop-up window containing the URL of the cursor image. Copy this URL, as we’ll need to add it to the CSS in the next step.
STEP 3: Add custom CSS in Cargo 2
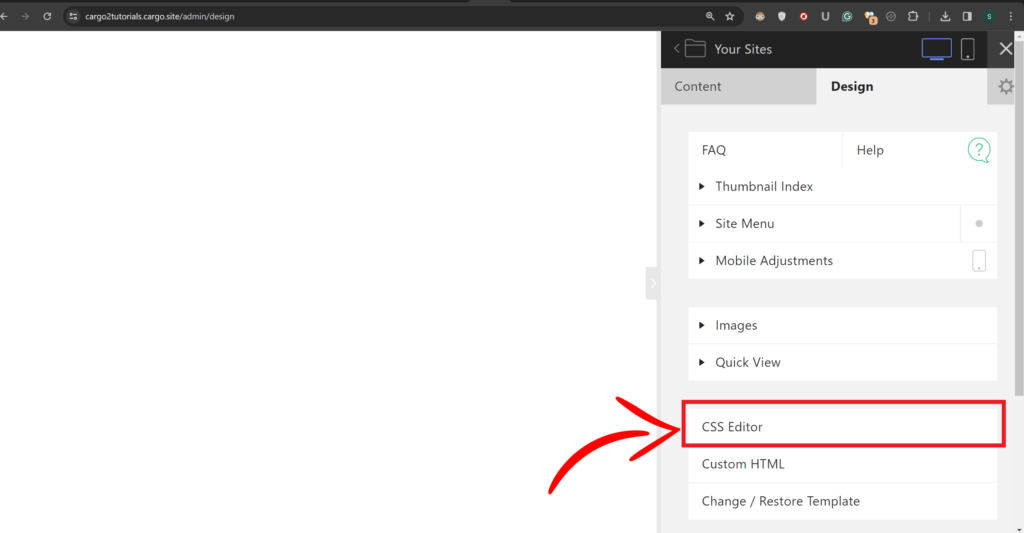
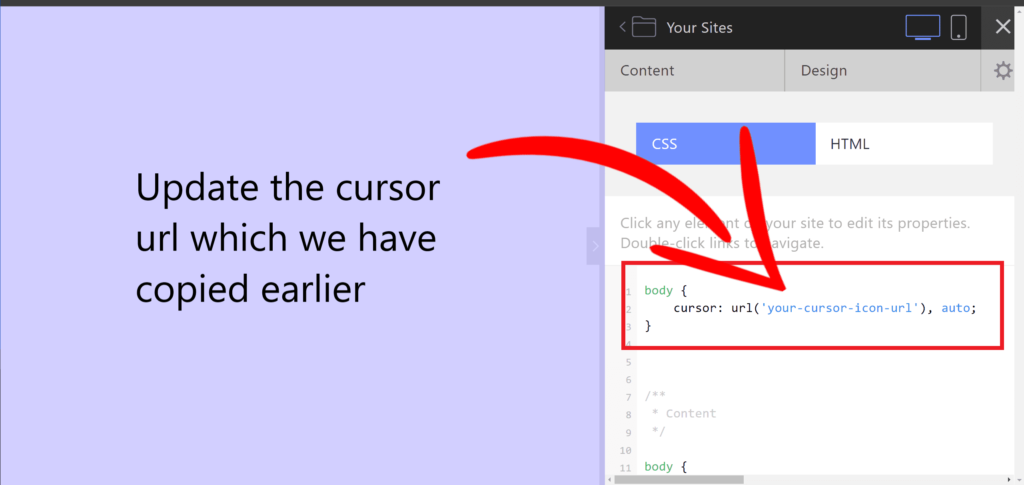
Go to the design tab and select the CSS editor. Then, add the custom code to change the cursor image on your Cargo 2 site by targeting the body element and updating the custom property. Make sure to replace the cursor URL with the one you copied earlier.
body {
    cursor: url('your-cursor-icon-url'), auto;
}
To change the cursor when hovering over an element linked to another page or anchor, target the <a> tag on hover and update the cursor property, similar to the previous steps. Make sure to replace the cursor URL with the appropriate one:
a:hover {
    cursor: url('URL_of_the_new_cursor_image'), auto;
}
If you encounter any issues or the cursor icon doesn’t display correctly, double-check the CSS code and the image file URL.
Conclusion
In conclusion, changing the cursor icon on your Cargo Site is a simple yet effective way to customize the user experience. By following the steps outlined above, you can upload your desired cursor image, update the CSS code targeting the body element, and even customize the cursor for specific links. Whether you’re looking to add a personal touch or enhance navigation, this feature allows you to make your website more engaging and unique. So, go ahead, explore different cursor icons, and make your Cargo Site stand out!
Thanks for reading this article.
Cheers✌
Hey, wait a minute,
Do you know how to connect custom domains from other hosting providers like Godaddy to Cargo. Click here to read the article on that.
