Add images in Cargo Collective site builder

Are you searching for the correct method to add images to your Cargo Site?
By adding images to the Cargo Site properly, you can enhance its visual appeal, accessibility, and SEO.
In this guide, we’ll walk you through the step-by-step process of adding images to the Cargo Site.
Why it is important to correctly upload images?
Sometimes, users simply copy an image from a source and paste it directly onto their website. However, this practice can lead to issues such as slow page loading, a frustrating user experience, and poor search engine optimization (SEO).
When it comes to adding images to your Cargo Site, it’s crucial to follow the right approach. This means using the appropriate file format, giving your images descriptive names, and providing alternative text.
For instance, instead of naming your image ‘IMG123.jpg’, opt for a descriptive name like ‘bali-vacation-photo.jpg’. This helps users and search engines understand what the image is about.
Additionally, resizing your images ensures they load quickly and look good on all devices. Formats like JPEG are highly compressed, resulting in faster loading times and better performance.
You can compress your images with the help of websites like iloveimg.com without affecting the quality of the images.
You can optimize your images for SEO and accessibility. This not only improves your website’s visibility in search engine results but also makes it more user-friendly for individuals with disabilities.
Now, let’s explore how to properly add images to the Cargo Site.
Add images to Cargo 2
1. First log into your cargo website.
2. Add a new page in the builder. If you do not know here you can read the article on how to add page.
how to add page in cargo collective
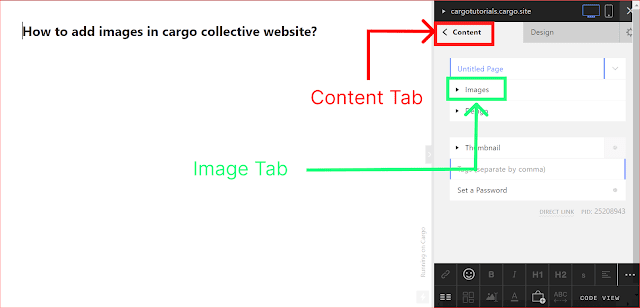
2. After that you will see an option to upload the image in the content tab and after that you can select the image from your computer.
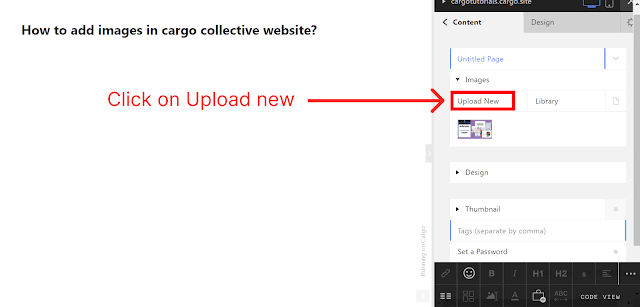
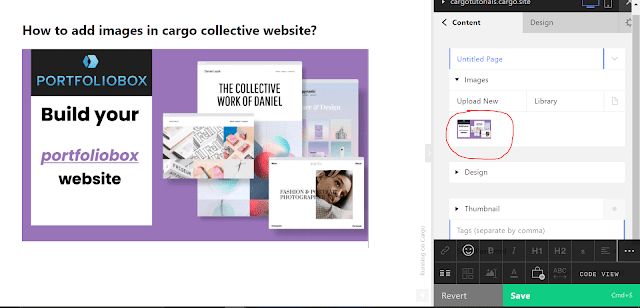
3. After uploading the image successfully from your computer, now drag the uploaded image inside your working website area. Click on Save to make the changes live.
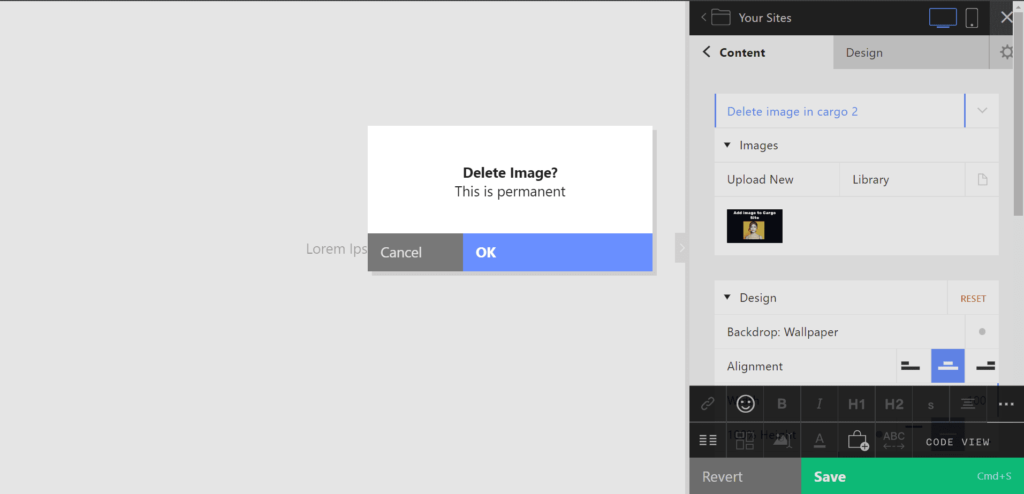
Delete image in Cargo 2
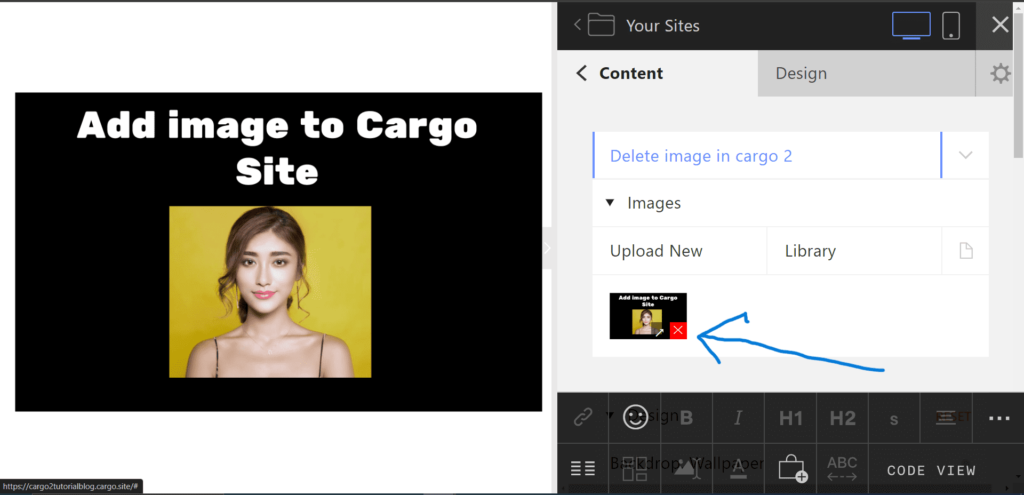
To delete an image in Cargo 2, hover over the image thumbnail. A red cross icon will appear at the top of the image. Click on it, and a pop-up message will appear to confirm the deletion. Click ‘OK’, and the image will be deleted.
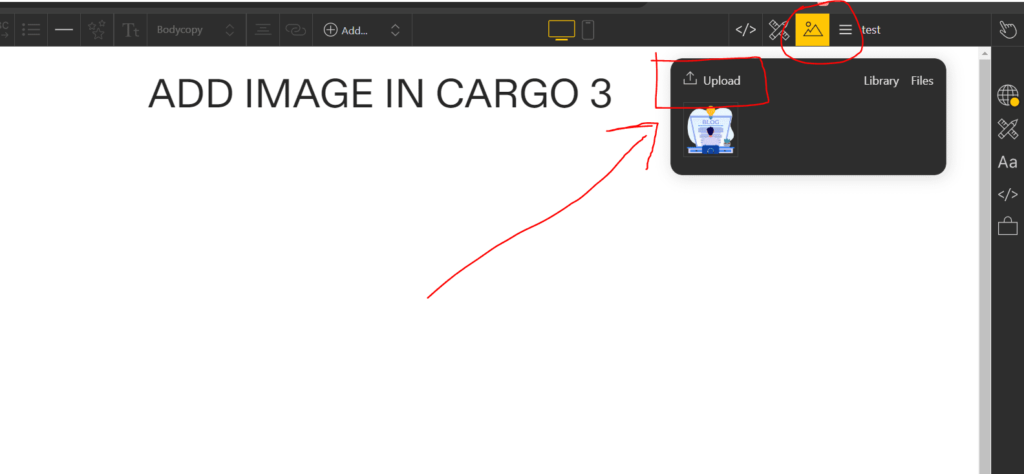
Add image to Cargo 3
Follow these steps to add image to Cargo 3.
- In your Cargo 3 editor, locate the image icon in the top header section.
- Click on the image icon to open a popup.
- Select ‘upload’ in the popup to upload your image.
- Once uploaded, drag the image from the popup and drop it onto the page to include it in your website
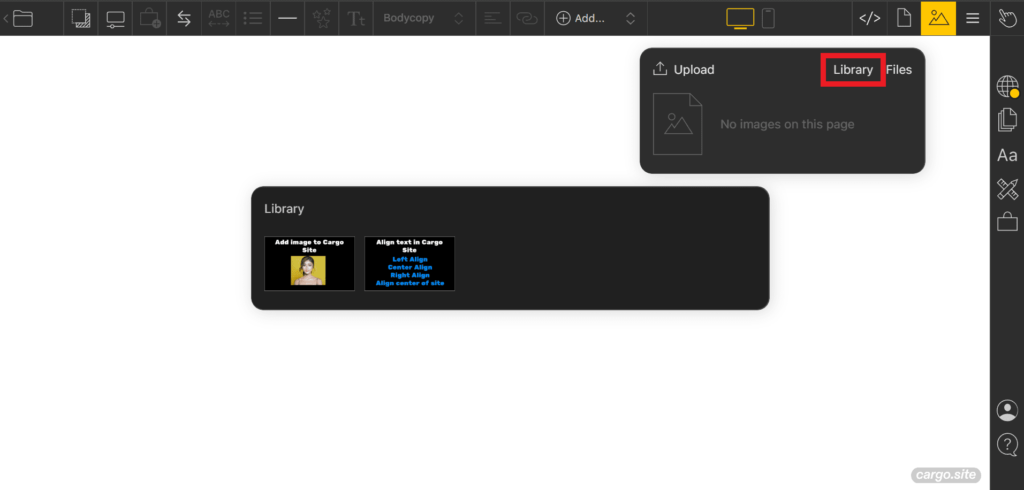
To view all the images on your website, click on ‘Library’ where you’ll find all the images. Simply drag and drop them onto the page to add a specific image to that page.
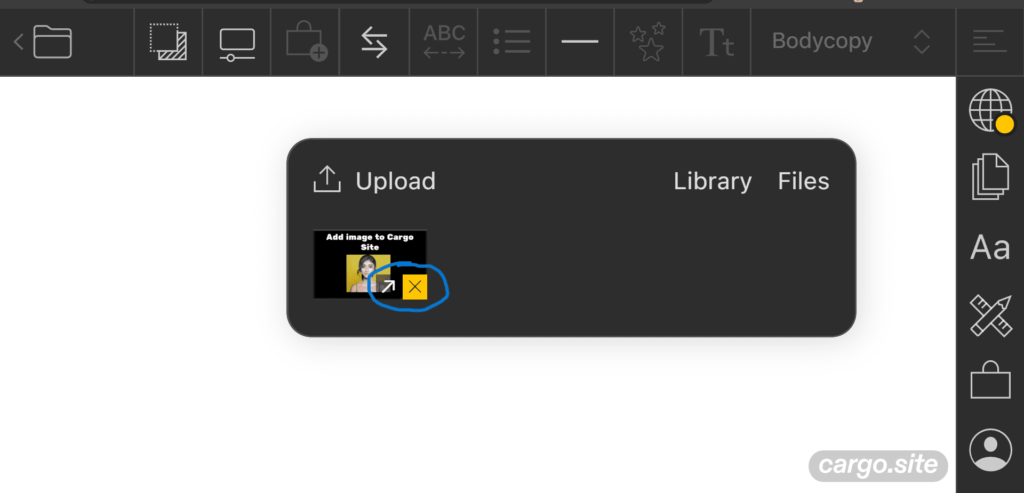
Delete image in Cargo 3
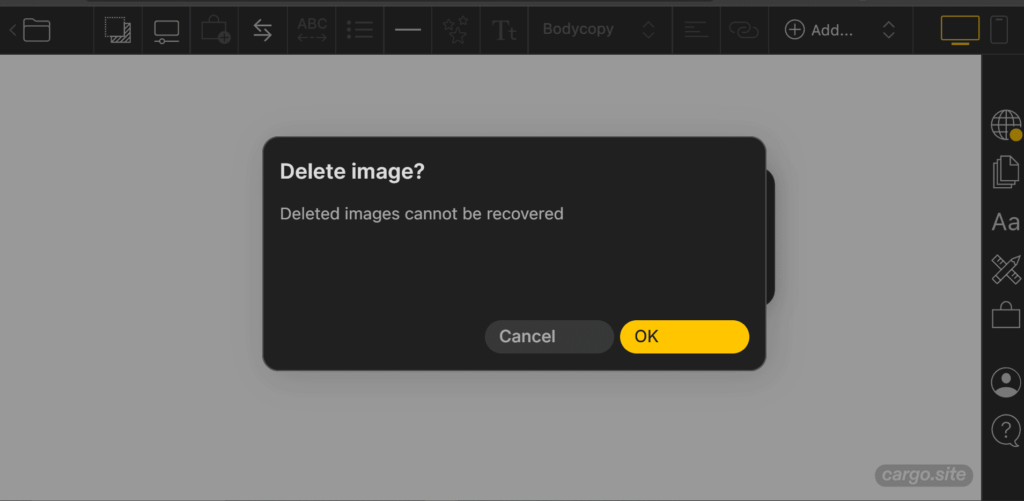
To delete an image in Cargo 3, hover over the image thumbnail. A yellow cross icon will appear at the top of the image. Click on it, and a pop-up message will appear to confirm the deletion. Click ‘OK’, and the image will be deleted.
Hurray!✌
We have successfully uploaded the image in Cargo 2 and Cargo 3. I have already told you that it is very easy to add images in Cargo Collective site builder.
But🧐
Do you know how to add icon or emoji’s😍 in cargo collective website builder.

