Cargo Site eCommerce shop – Complete Guide
Add Cargo Site eCommerce shop
This blog will guide you through the process of adding the Cargo Site eCommerce shop. We’ll cover everything from adding products and implementing the ‘Add to Cart’ functionality to adding the Cart button and integrating payment gateways. Additionally, we’ll explore all the commerce settings to ensure your online store is set up exactly as you need it.
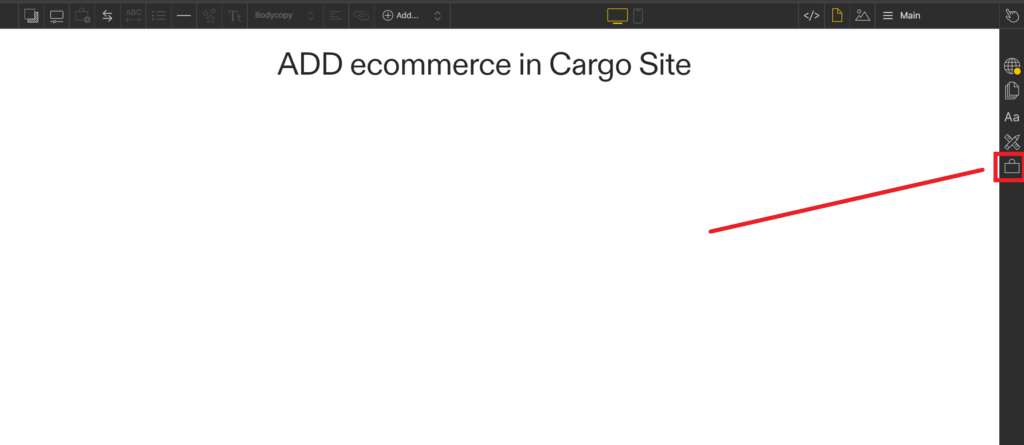
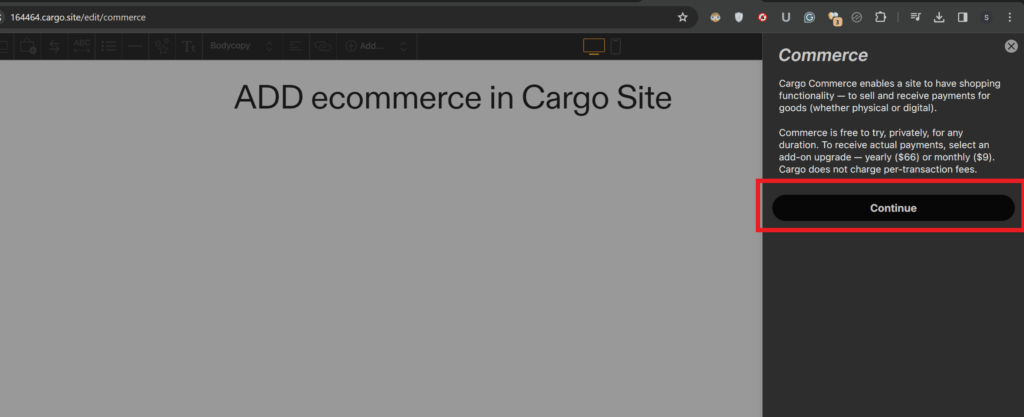
First, let’s turn on the shopping feature since it’s off by default. Look for the shopping bag icon on the right-hand side of the navigation bar, then click on it. After that, click on the ‘Continue’ button.
Adding a Product
First, let’s learn how to add products in Cargo 3. We’ll cover adding a physical product without variation, a physical product with variation, and a digital product in Cargo Site eCommerce.
Physical product (without variation)
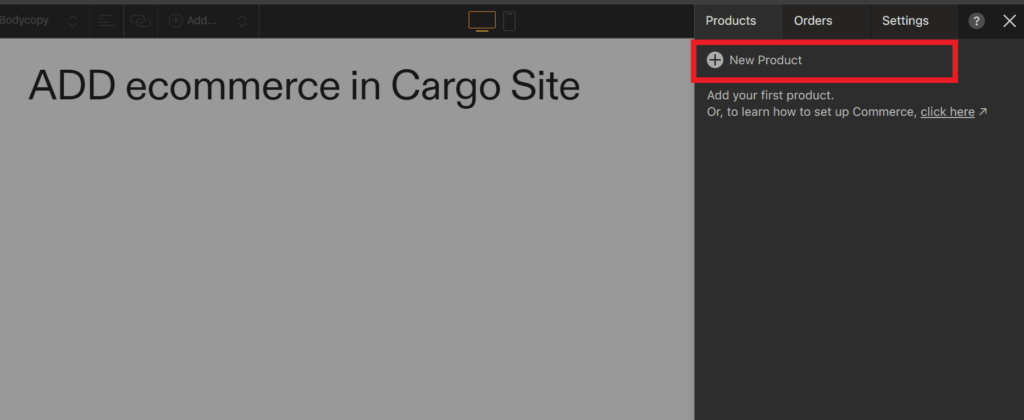
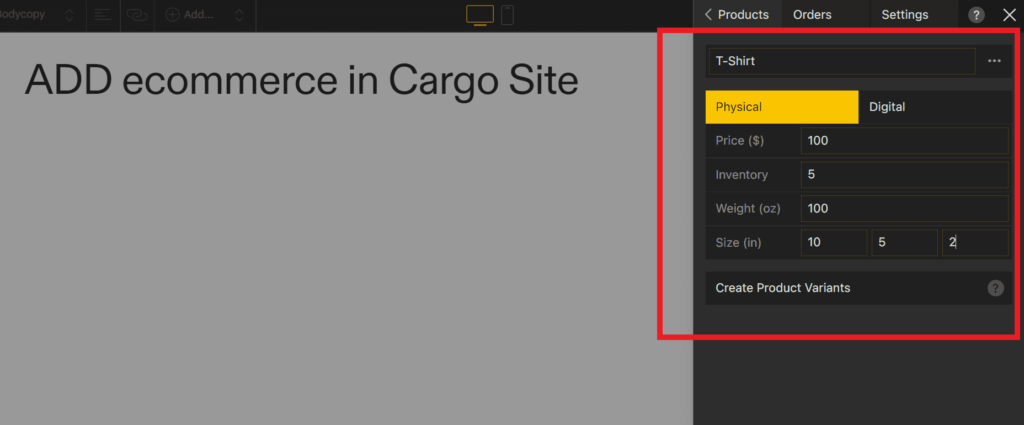
Navigate to the Products Tab, then click on ‘New Product.’ You’ll see various options such as the product name, where you can name your product. Next, choose the type of product – in this case, select ‘Physical.’ Then, add the price of the product, inventory quantity, weight in ounces, and size in inches. Finally, click on ‘Save’ to save the product.
- Price: Enter the price of the product.
- Size: Specify the size of the product in inches.
- Weight: Input the weight of the product in ounces.
- Inventory: Specify the quantity of the product in stock.
Physical product (with variation)
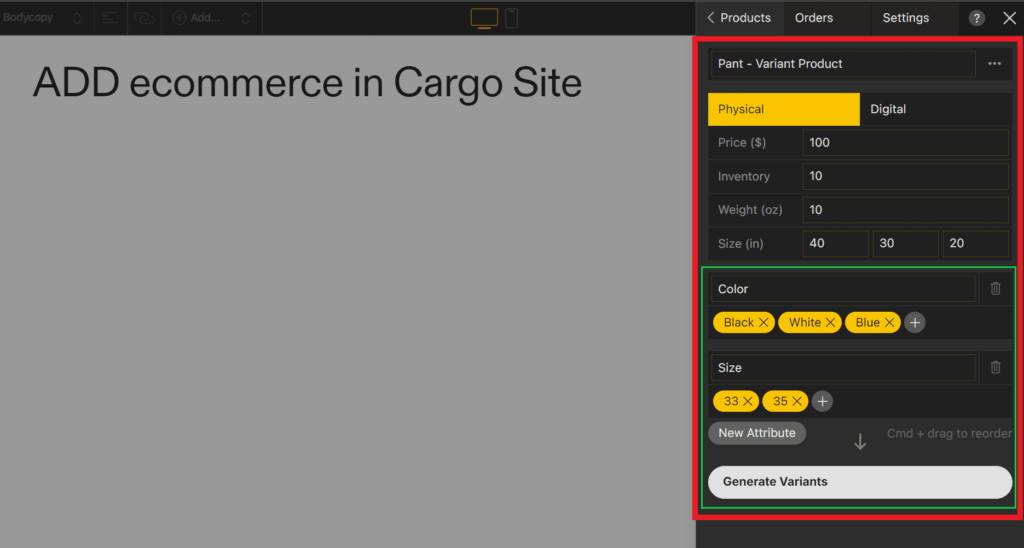
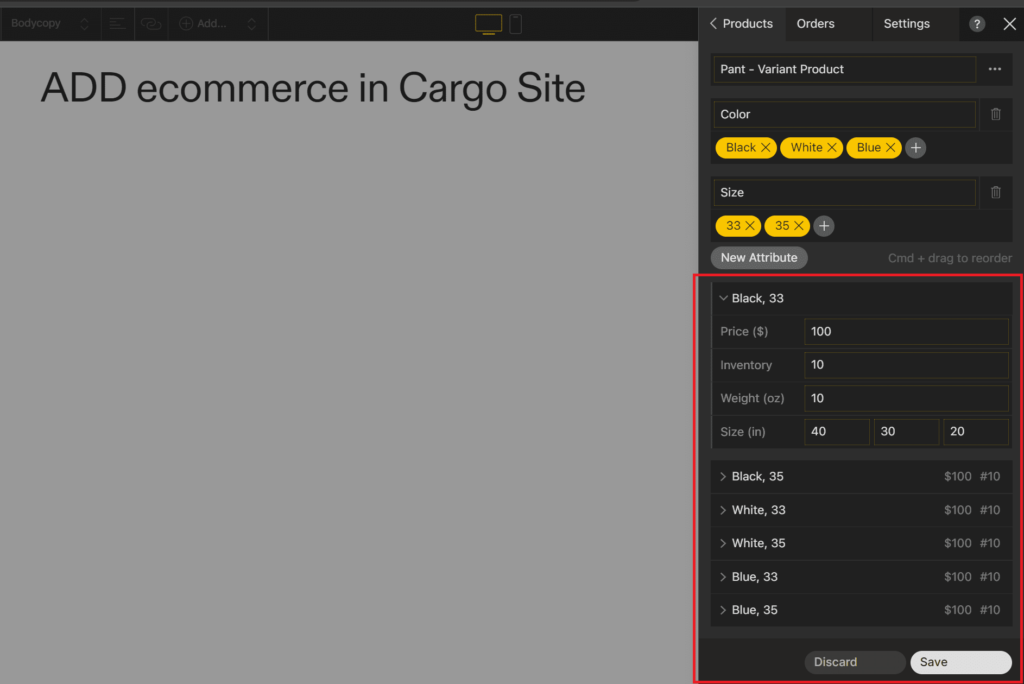
Now, let’s explore adding a product with variations, such as size and color. Simply click on ‘Add Product’ and enter all the product details. Next, to create variations, click on ‘Create Product Variations.’ Add a variation name, like ‘Color,’ and its types such as black, white, and blue. Similarly, create another variation attribute type like ‘Size’ and add its types like 33, 36. Then, click on ‘Generate Variants’ to create all variation products. You can then individually specify the price and other product details based on the type.
Add digital product
Let’s learn how to add a digital product, like an eBook. Digital products are things you can get online, such as software, eBooks, music, and videos.
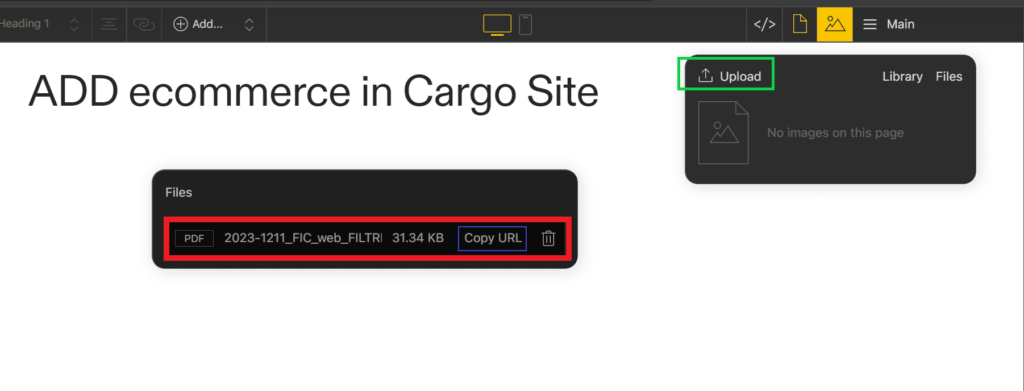
For this example, we’ll focus on adding an eBook in PDF format. First, upload the PDF file to Cargo, then copy the web address (URL).
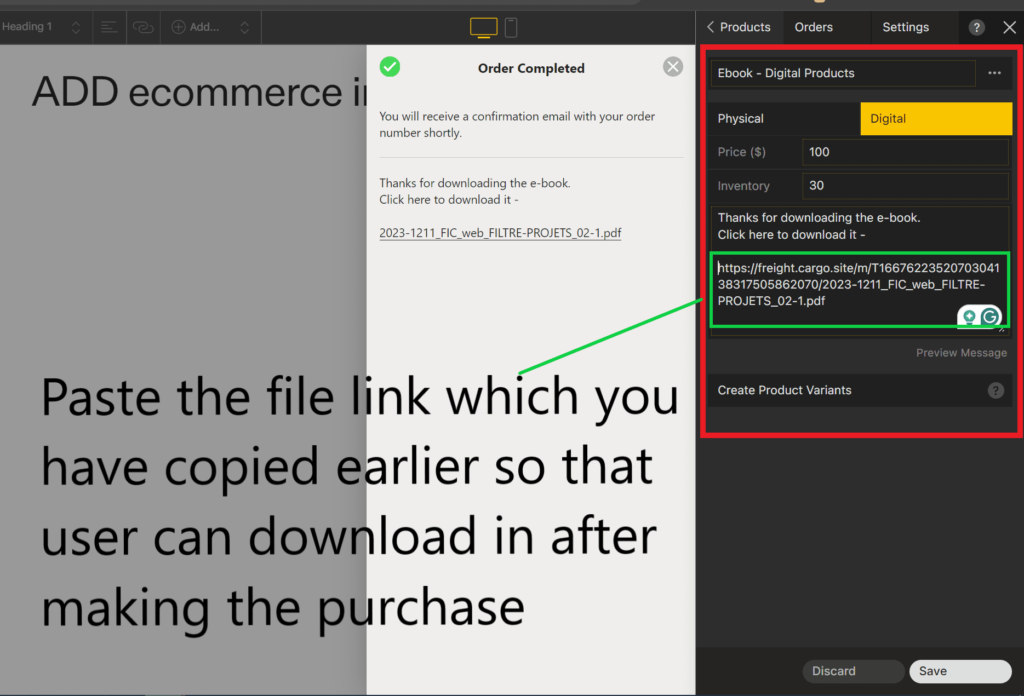
Next, go to the product section and give your eBook a name. Choose ‘Digital’ as the type. Add the price, and write a message for users after they’ve paid. Finally, paste the URL of your eBook so users can download it.
Add Product to Cargo Site
Let’s take a look at adding products to your Cargo site.
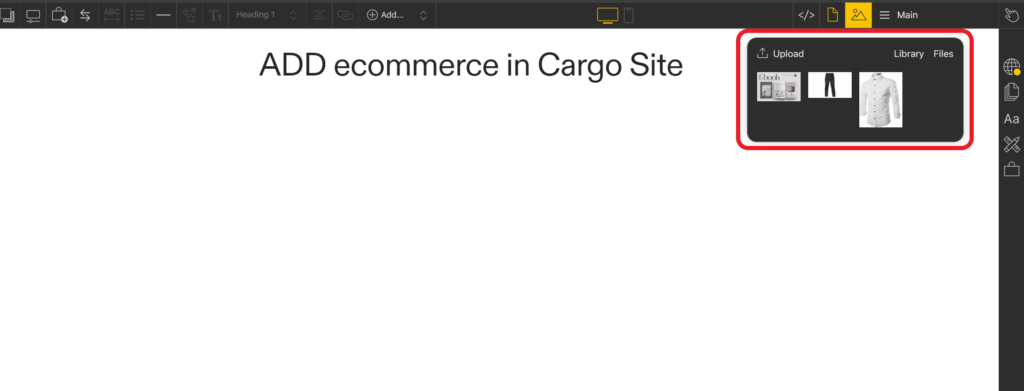
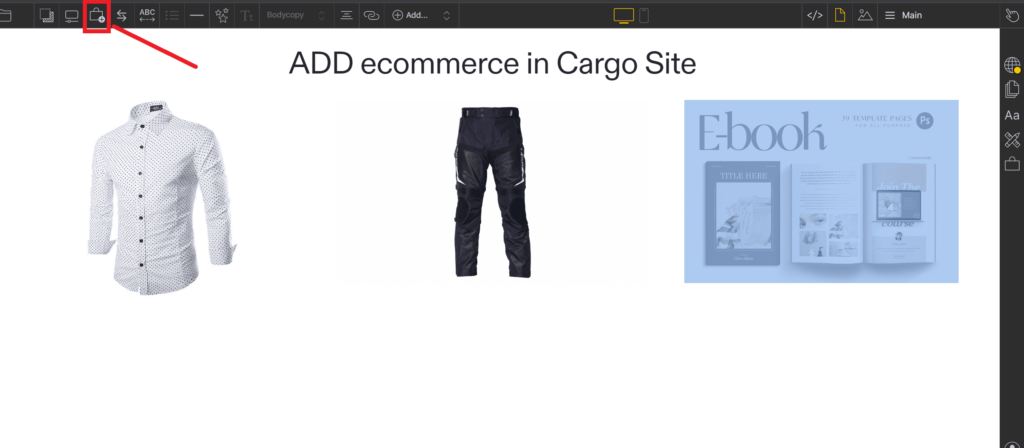
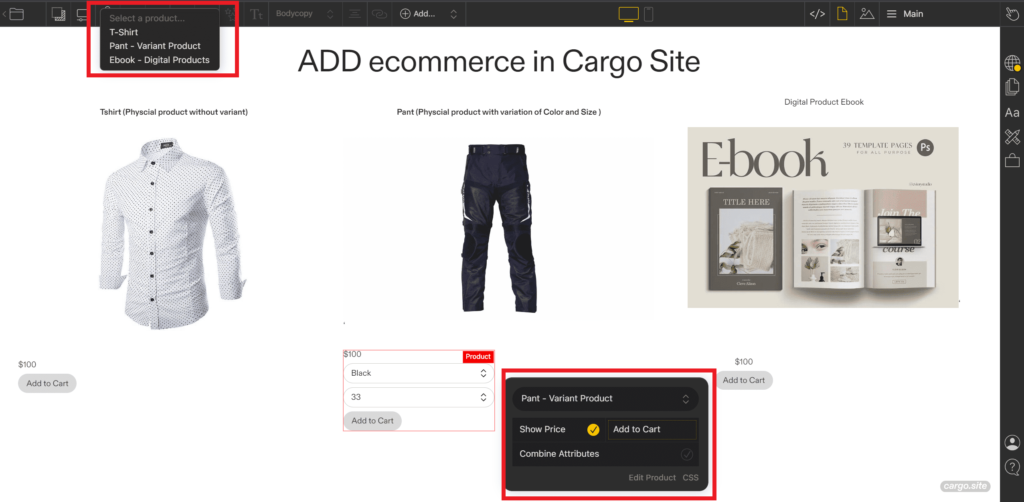
First, upload all your product images and add them to the site. Then, in the top left corner, you’ll see a Bag icon with a plus sign. Click on it, and it will display all the products you’ve created. Click on the product name to add the ‘Add to Cart’ button. This will add a button to your site.
When you click on the ‘Add to Cart’ button, a window will appear with more options. You can choose to hide the price if you want and change the text of the ‘Add to Cart’ button.
Add View Cart button
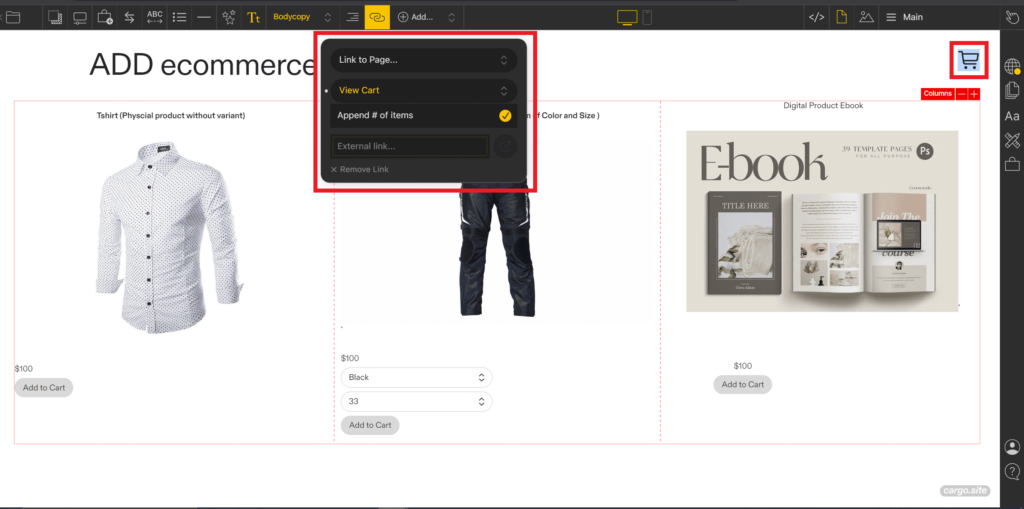
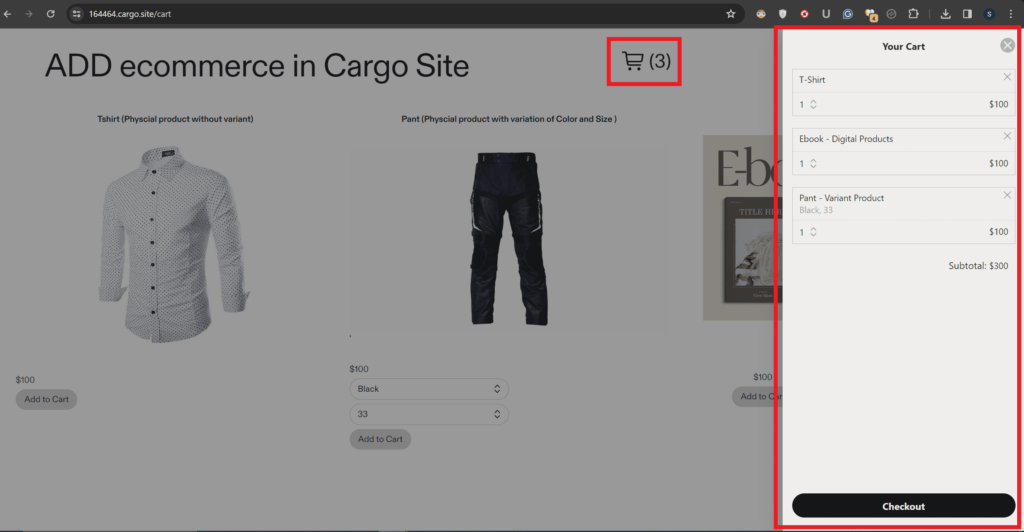
Next, let’s learn how to display the ‘View Cart’ button. First, add the Cart Icon to your site. Select it, click on the link option, and choose ‘View Cart.’ Make sure to enable the ‘Append # of items’ checkbox. This allows users to click on the button and see the products they’ve added to their cart.
Shop Settings
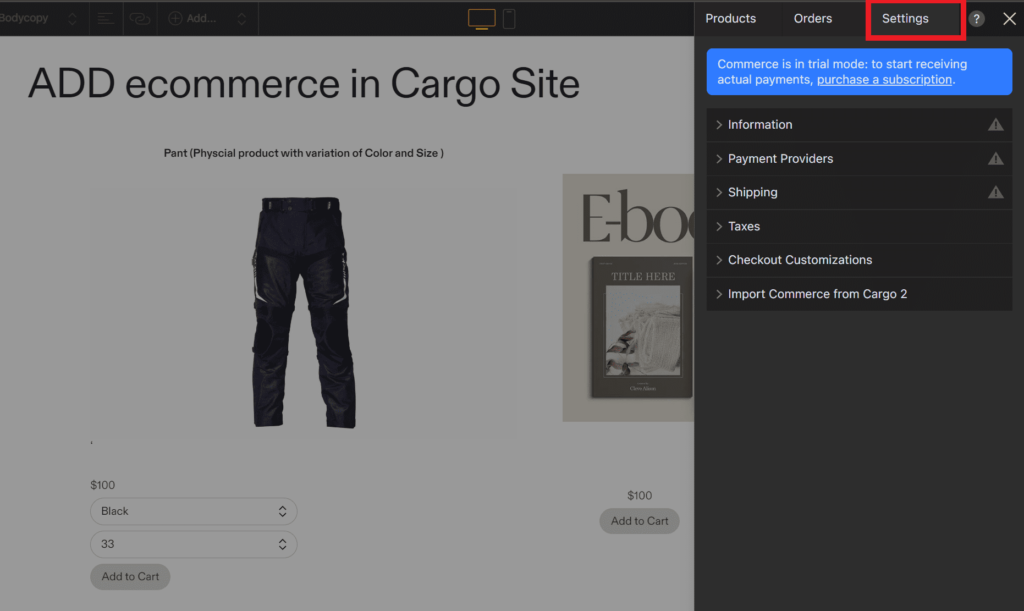
Now we can go to the Settings tab to customize the different settings provided by Cargo Commerce.
Information
In the information tab, you can add information about your shop like
- Shop Name
- Phone
- Country
- Address
- Address 2
- City
- State
- Zip
- Currency
- Units

Payment Providers
Cargo supports two payment providers Stripe and Paypal. You can add any of the providers of your choice.

Setup Stripe payment gateway
- Go to the Settings tab and open the Payment Providers menu.
- Click on Stripe and enter your details in the popup window. If you already have a Stripe account, just log in.
- Once completed, you can start accepting credit card payments.
In addition to regular credit cards, users on Safari can also pay with Apple Pay.
Your Stripe account is only used for accepting credit card payments; it’ll deposit funds into your bank account. Cargo handles everything else.
Remember that Stripe, like other Payment Gateway Providers, has its fee structure. You can check their website for details. (Cargo doesn’t charge a per-transaction fee.)”
Setup Paypal payment gateway
To accept payments via PayPal, you’ll need a PayPal Business Account. You can set it up if you don’t have one by visiting the provided link. If you already have a PayPal account, you can upgrade it to a Business Account following the instructions on this page.
Once your account is set up, you’ll need to create a new live “app” and generate “keys” from the developer applications page on PayPal’s website. Make sure to note down your “client ID” and “secret” for later use.
To connect your PayPal account to Cargo, go to the Payment Providers menu in Commerce Settings and click on PayPal.
Remember that PayPal, like other Payment Gateway Providers, has its fee structure. You can find details on their website. (Cargo doesn’t charge a per-transaction fee.)
Shipping
There are three ways to handle shipping:
- Ship for free.
- Define your shipping options. You can specify shipping zones and define shipping costs for specific continents, countries, and regions.
- Use Shippo. This service interfaces with shipping companies like UPS, FedEx, and DHL and allows your shop to calculate rates and generate shipping labels.
Taxes
In Commerce Settings, you can set up tax rates for each country and state. Here’s how:
- Open the Taxes menu.
- Select ‘Define your own taxes’ and click on ‘New rate.’
By default “Do not collect taxes” is selected if can keep it if you do not want to add tax.
Please note: Tax regulations vary depending on your location, such as region, state, province, or country. It’s essential as a merchant to ensure accurate tax calculations and filing. We recommend consulting with a tax advisor.
For sellers in the US, you can refer to this guide for more information. European sellers can find guidance in this guide.
Checkout Customizations
Checkout customizations can enhance the shopping experience for your customers. Here are some options available in the Commerce Settings tab:
- Cart Appearance: You can toggle between the Cart theme between Dark and Light mode.
- Terms & Conditions checkbox: You can link this to a page on your site where you specify your terms and conditions. You can also choose to make this checkbox a requirement for all transactions.
- Customer Note field: This allows customers to leave a comment during checkout. You can also make this field a requirement for all transactions if needed.
- Custom Order Success message: After a successful payment, you can display a personalized message. By default, it reads: ‘Order Completed. You will receive a confirmation email with your order number shortly.’
- Custom Order Success page: Specify any page on your site to be displayed when an order is completed. This allows you to further customize the post-purchase experience for your customers.
- Require a phone number: You can enable this option if you want that user must submit their mobile number during checkout.

Orders
After a customer makes a purchase, you’ll find it in the Orders tab.
If the order needs shipping, a print-ready packing list is automatically generated. This list summarizes the order details, and you can access it by clicking on ‘Packing List.’
If you’re using Shippo as a third-party shipping provider, you can buy and print a shipping label directly from the order page. You can then email the tracking number to the customer in the ‘Your Order Has Shipped’ email.
For manual shipping handling, you can enter a tracking number and include it in the ‘Your Order Has Shipped’ email.
In the ‘Refund’ menu, you can issue partial or full refunds, which triggers a refund confirmation email to the customer.
Once an order is complete, click on ‘Mark as Complete.’ This action moves the order to the Completed section in the Orders tab.

So, now we’ve covered all the steps to set up Cargo Site eCommerce. To begin accepting payments, ensure you purchase the ‘Cargo e-commerce subscription.’ By default, it starts in trial mode, allowing you to explore the features before committing to the subscription.
Thanks for reading the blog🚀


