Add flying objects to the Cargo Site
Animations on your cargo site can make it more fun and interesting for people to explore. They can also help visitors find their way around and show them what’s important. Plus, they make your site look professional and unique, helping your brand stand out and leaving a memorable impression on anyone who stops by.
We are going to implement this functionality for both Cargo 2 and Cargo 3.
Add flying objects animation in Cargo 2
To make things fly around on Cargo 2, we just need a bit of CSS. Don’t worry, it’s easy! I’ll show you how to adjust the CSS to suit what you need.
Follow these steps to Add flying objects animation in Cargo 2:
Begin by accessing your Cargo 2 editor. From there, proceed to upload an image.
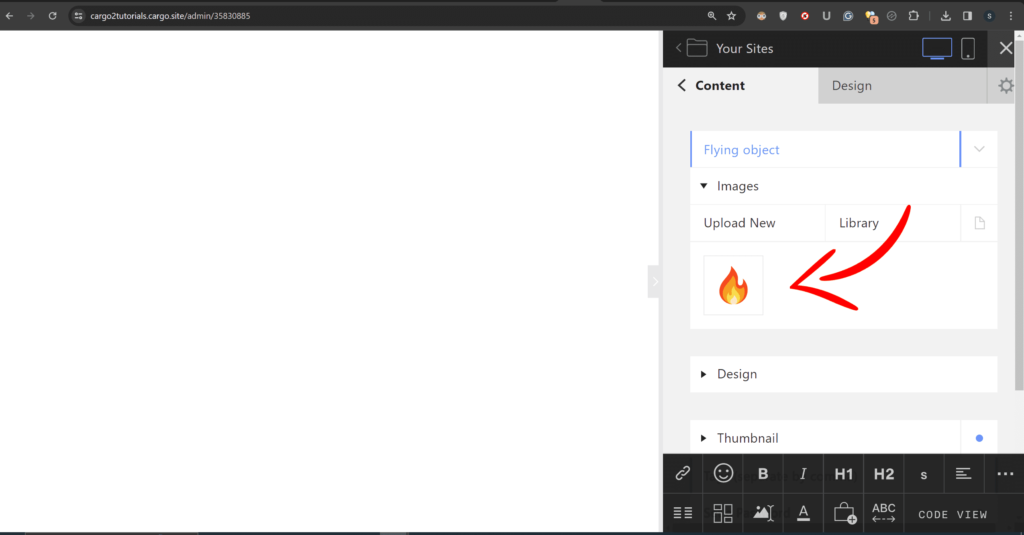
After that, navigate to the ‘CODE VIEW’ section and insert the image enclosed within a div with the class ‘flier’ as shown in the code below.
<div class="flier"> {image 1} </div>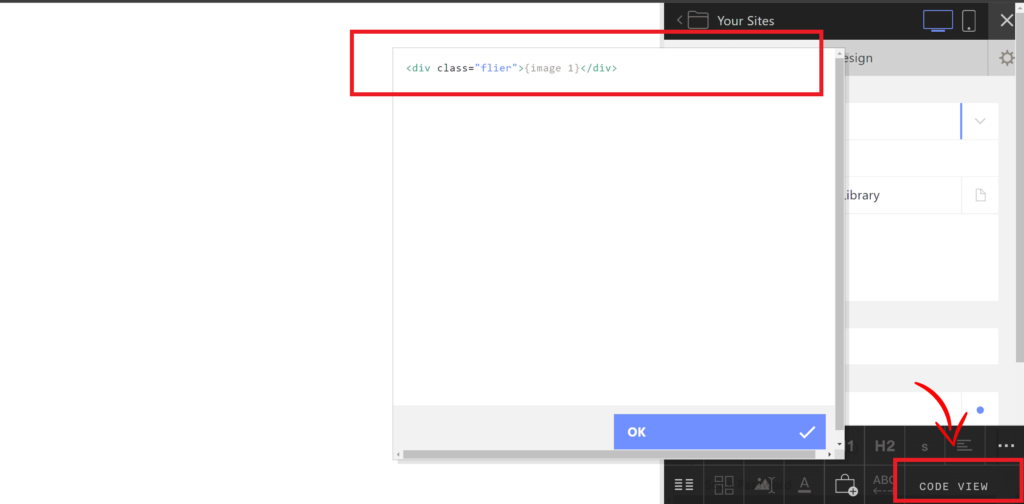
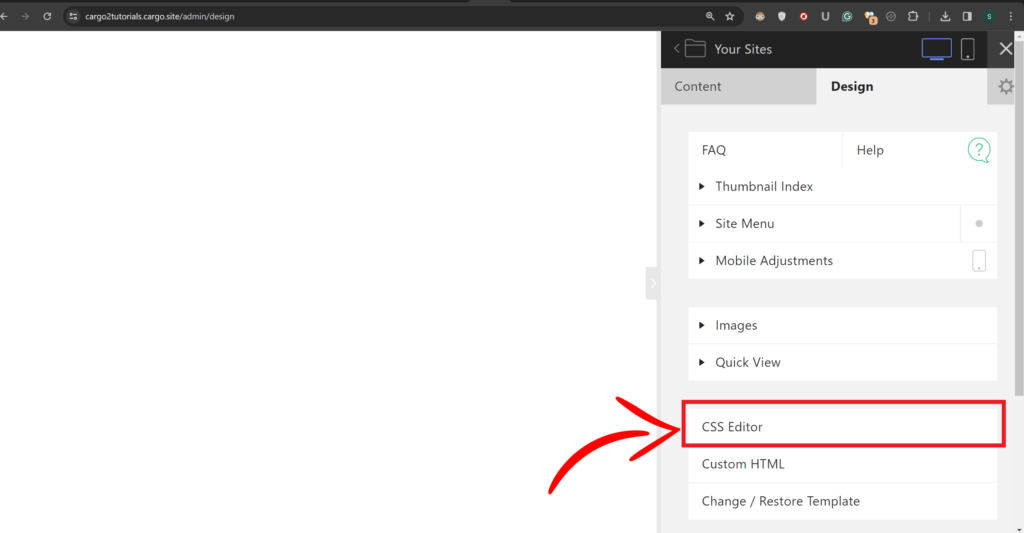
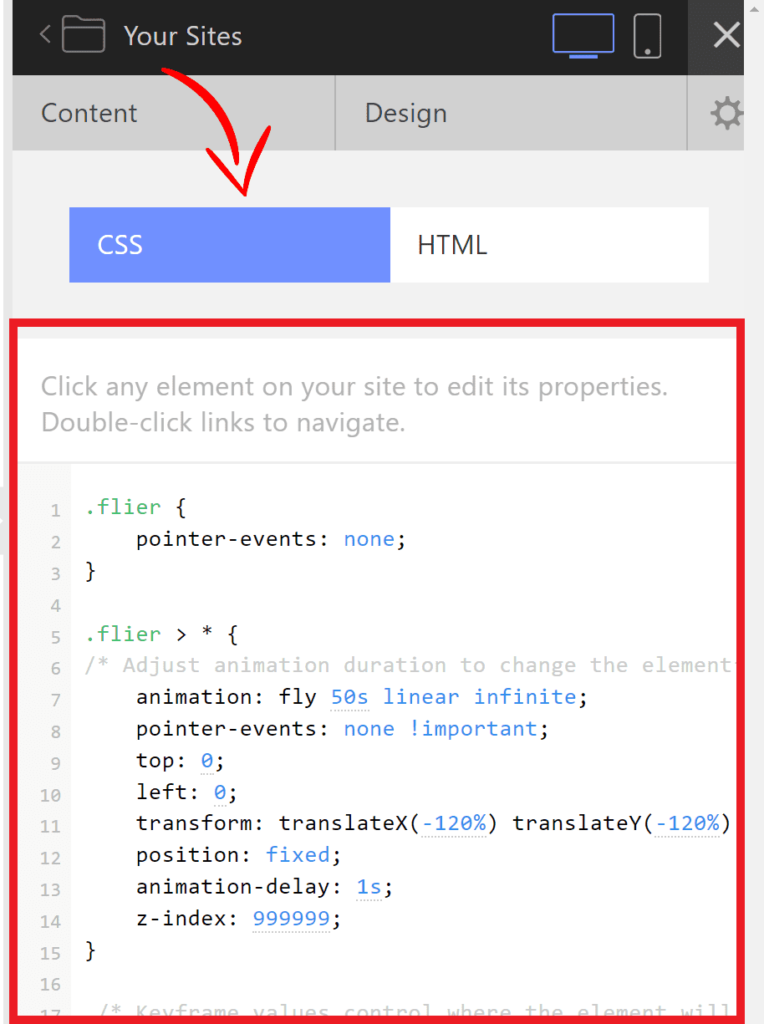
Now, head over to the ‘CSS Editor’ and paste the following CSS code:
.flier > * {
/* Adjust animation duration to change the element’s speed */
    animation: fly 50s linear infinite;
    pointer-events: none !important;
	top: 0;
	left: 0;
	transform: translateX(-120%) translateY(-120%) rotateZ(0);
	position: fixed;
	animation-delay: 1s;
	z-index: 999999;
}

 /* Keyframe values control where the element will begin
    and end its trajectory across the screen. Each rule
    represents a path the element follows across the screen. */


@keyframes fly {

	98.001%, 0% {
                display: block;
		transform: translateX(-200%) translateY(100vh) rotateZ(0deg)
	}

	15% {
		transform: translateX(100vw) translateY(-100%) rotateZ(180deg)
	}

	15.001%, 18% {
		transform: translateX(100vw) translateY(-30%) rotateZ(0deg)
	}

	40% {
		transform: translateX(-200%) translateY(3vh) rotateZ(-180deg)
	}

	40.001%, 43% {
		transform: translateX(-200%) translateY(-100%) rotateZ(-180deg)
	}

	65% {
		transform: translateX(100vw) translateY(50vh) rotateZ(0deg)
	}

	65.001%, 68% {
		transform: translateX(20vw) translateY(-200%) rotateZ(180deg)
	}

	95% {
		transform: translateX(10vw) translateY(100vh) rotateZ(0deg)
	}
}
here’s a simple breakdown of the CSS properties used in the above code:
- .flier Selector:
- Target elements with the class “flier” for styling.
- pointer-events: none;
- Prevents mouse events, like clicking, from being applied to the elements.
- .flier > * Selector:
- Selects direct children of elements with the “flier” class for specific styling.
- animation: fly 50s linear infinite;
- Applies the “fly” animation to the elements with a duration of 50 seconds, moving linearly and repeating infinitely.
- top: 0; left: 0;
- Sets the initial position of the animated elements at the top-left corner of the viewport.
- transform: translateX(-120%) translateY(-120%) rotateZ(0);
- Defines the initial transformation of the elements, moving them off-screen to the top-left and not rotating them.
- position: fixed;
- Specifies that the elements are positioned relative to the viewport, not the document flow.
- animation-delay: 1s;
- Adds a delay of 1 second before starting the animation.
- z-index: 999999;
- Sets a high stacking order for the elements, ensuring they appear above other content on the page.
- @keyframes fly:
- Defines the keyframes for the “fly” animation, specifying different positions and rotations at various points in time.
By following these steps, you can easily add a flying object to your Cargo site using CSS animations.
Add flying objects animation in Cargo 3
To add a flying objects animation in Cargo 3, you don’t need to write any CSS. The editor provides easy settings to add a flying object effortlessly.
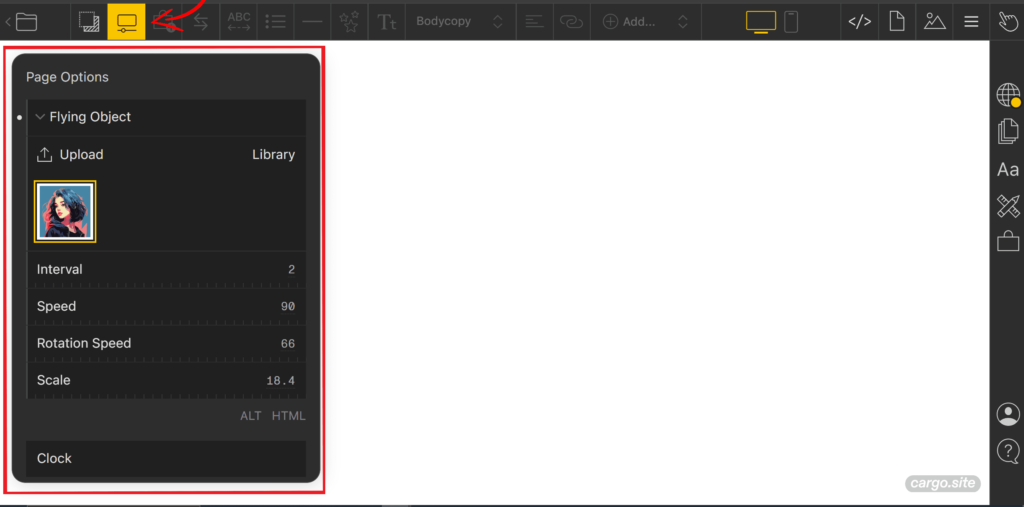
- Open the Cargo 3 editor and click on the rectangle icon at the top left.
- In the popup window, select the ‘Flying object’ option.
- Expand the options and upload your image or choose one from the library.
- Adjust the settings:
- Interval: This determines how frequently the flying object will appear on the screen. For example, if you set the interval to 5 seconds, the object will appear every 5 seconds.
- Speed: This controls how quickly the flying object moves across the screen. A higher speed value will make the object move faster, while a lower value will make it move slower.
- Rotation speed: This specifies how rapidly the flying object will spin as it moves. Increasing the rotation speed will make the object spin faster while decreasing it will slow down the rotation.
- Scale: This allows you to adjust the size of the flying object. You can increase or decrease the scale to make the object appear larger or smaller on the screen, respectively. Adjusting the scale can help you achieve the desired visual impact for your flying object animation.
Once settings are adjusted, click on ‘Publish Changes’ to make the flying object live on your site.
Add bouncing animation across the screen in Cargo 3
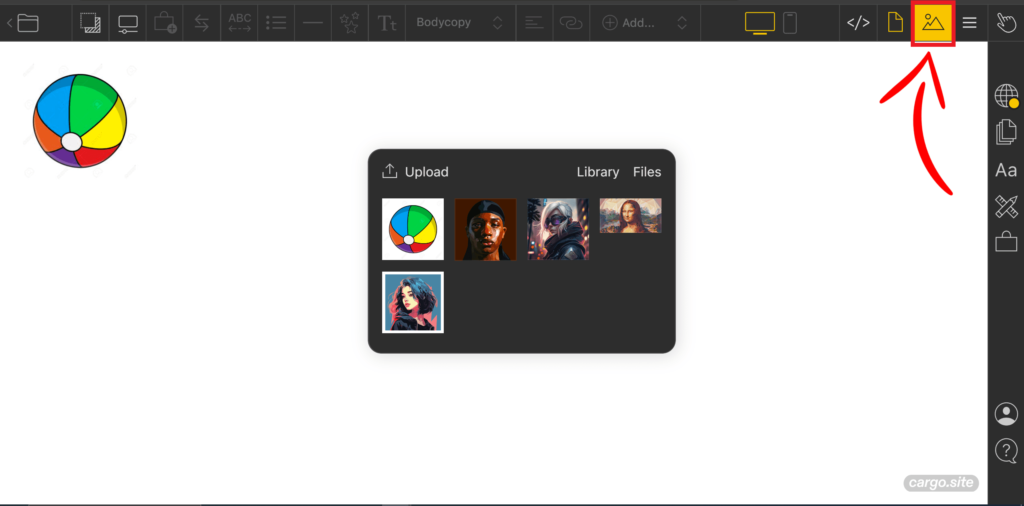
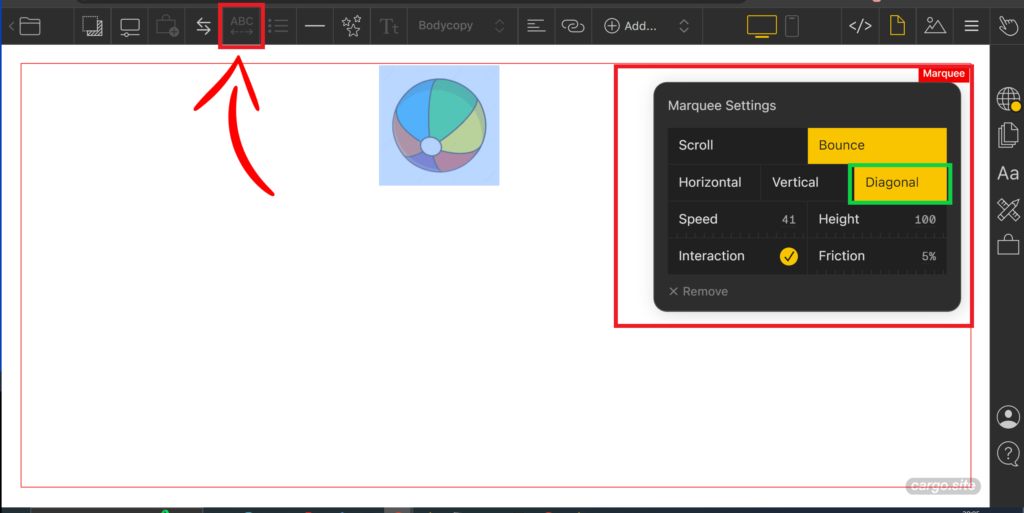
- Open the Cargo 3 editor and upload your desired image, like the ball image used in this example.
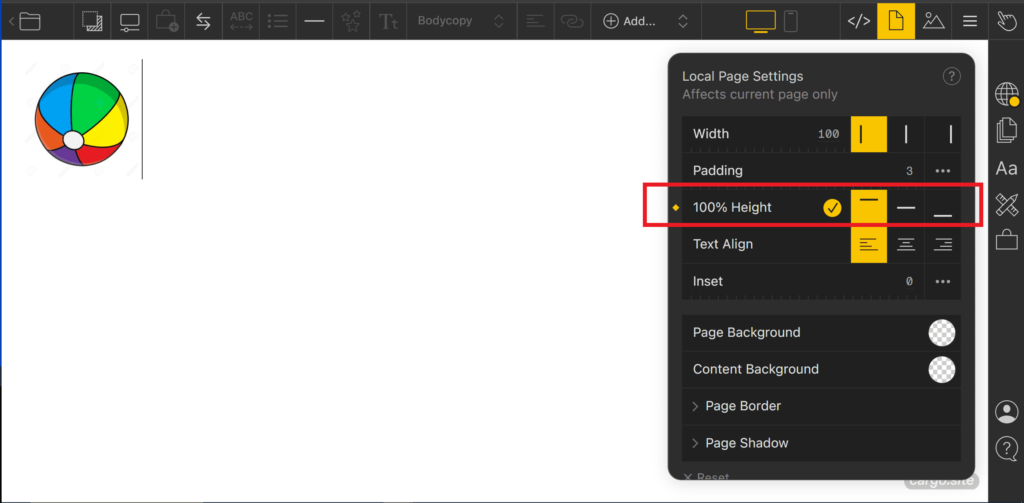
- Go to the local page settings and ensure that the “100% height” option is checked to make sure the animation covers the entire screen.
- Select the uploaded image and click on the marquee option located at the top-left corner. This will open a window with options.
- Choose the “Bounce and diagonal” option to make the ball bounce diagonally across the screen.
- In the options window, you’ll find four settings:
- Speed: Adjust to make the object move faster or slower.
- Height: Modify to change the vertical distance the image will move.
- Interaction: Enable this option if you want users to be able to drag the image.
- Friction: Adjust the percentage to control how much the object slows down over time.
- Once you’ve adjusted the settings to your liking, click “Save” to apply the changes and see the bouncing ball animation on your Cargo 3 page.
Conclusion
In summary, it’s easy to make your Cargo site more fun and engaging by adding flying and bouncing objects. Whether you prefer coding or using built-in features, these animations can make your site look great and keep visitors interested. Try out different options to see what works best for you. With a little creativity, you can make your Cargo site really special!
I hope you have found this blog helpful if you have any queries regarding the Cargo Site you can ask in the Discussion Forum.

